SmartupiQR 31 Dec 2025
How to Create a SmartUPIQR API Account
How to Create a SmartUPIQR API Account (Step-by-Step Guide)
SmartUPIQR provides a simple and developer-friendly API to generate dynamic UPI QR codes for accepting payments directly into your bank account. Follow the steps below to create your SmartUPIQR API account and start collecting payments instantly.
Step 1: Visit the SmartUPIQR Website
Open your browser and go to the official website: smartupiqr.co.in
Click on the Sign Up or Register button from the homepage.
Step 2: Create Your Account
Fill in the registration form with the required details:
- Full Name
- Email Address
- Mobile Number
- Password
After submitting the form, verify your email address or mobile number using the OTP sent to you.
Step 3: Login to SmartUPIQR Dashboard
Once verified, log in to your account using your registered credentials.
After login, you will be redirected to the SmartUPIQR Dashboard, where you can manage QR codes, API access, and transactions.
Step 4: Add Your UPI Details
SmartUPIQR does not provide a UPI ID. You must add your own:
- UPI ID (VPA)
- Merchant/Business Name
- Bank Account (linked to the UPI ID)
✅ All payments will be credited directly to your bank account via UPI.
Step 5: Choose a Subscription Plan
Select a suitable plan based on your usage:
- Monthly / Quarterly / Yearly plans
- Unlimited Dynamic QR generation
- Zero transaction fees
Complete the plan payment to activate API access.
Step 6: Generate API Key
After plan activation:
- Go to API Settings or Developer Section
- Click Generate API Key
- Copy and store the API Key securely
- This key will be used to authenticate all your API requests.
Step 7: Integrate SmartUPIQR API
Use the API key to integrate SmartUPIQR into:
- Websites
- Mobile Apps
- Billing Systems
- Checkout Pages
You can generate dynamic QR codes by sending:
- Amount
- Order ID / Reference ID
- UPI ID
The API returns a QR code image or payment URL.
Step 8: Display QR & Accept Payments
- Show the QR code to the customer
- Customer scans using any UPI app (PhonePe, Google Pay, Paytm, BHIM, etc.)
- Payment is completed instantly
- Money is credited directly to your bank account
Step 9: Track Transactions
From the dashboard, you can:
- View real-time payment status
- Track successful & failed transactions
- Match payments using Order ID
(Optional) Enable webhooks to get payment updates automatically.
Important Notes:
- SmartUPIQR is not a payment gateway
- No escrow or wallet system
- No transaction settlement delay
- Your UPI ID must be active and verified
Conclusion
Creating a SmartUPIQR API account is quick and easy. With minimal setup, you can start accepting UPI payments via dynamic QR codes and receive funds directly into your bank account with zero transaction fees—making it ideal for startups, merchants, and developers.
-
Categories
- Paytm Business 2
- Phonepe Business 2
- BharatPe Business 2
- SmartupiQR 2
- FreeCharge Business 1
Popular Posts
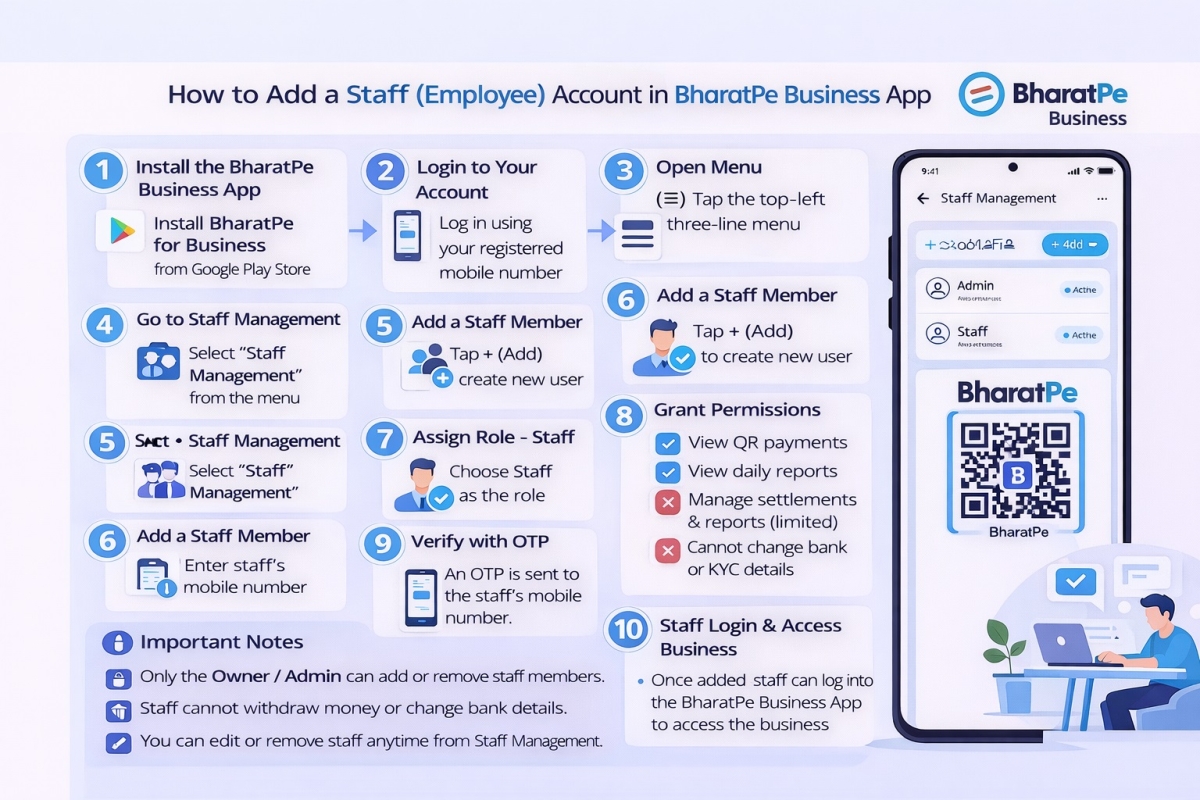
Step by step guide to create a Staff account in the BharatPe…
30 Dec 2025 126

Why SmartupiQR Is the Best Dynamic QR Code API for Instant Bank…
31 Dec 2025 112
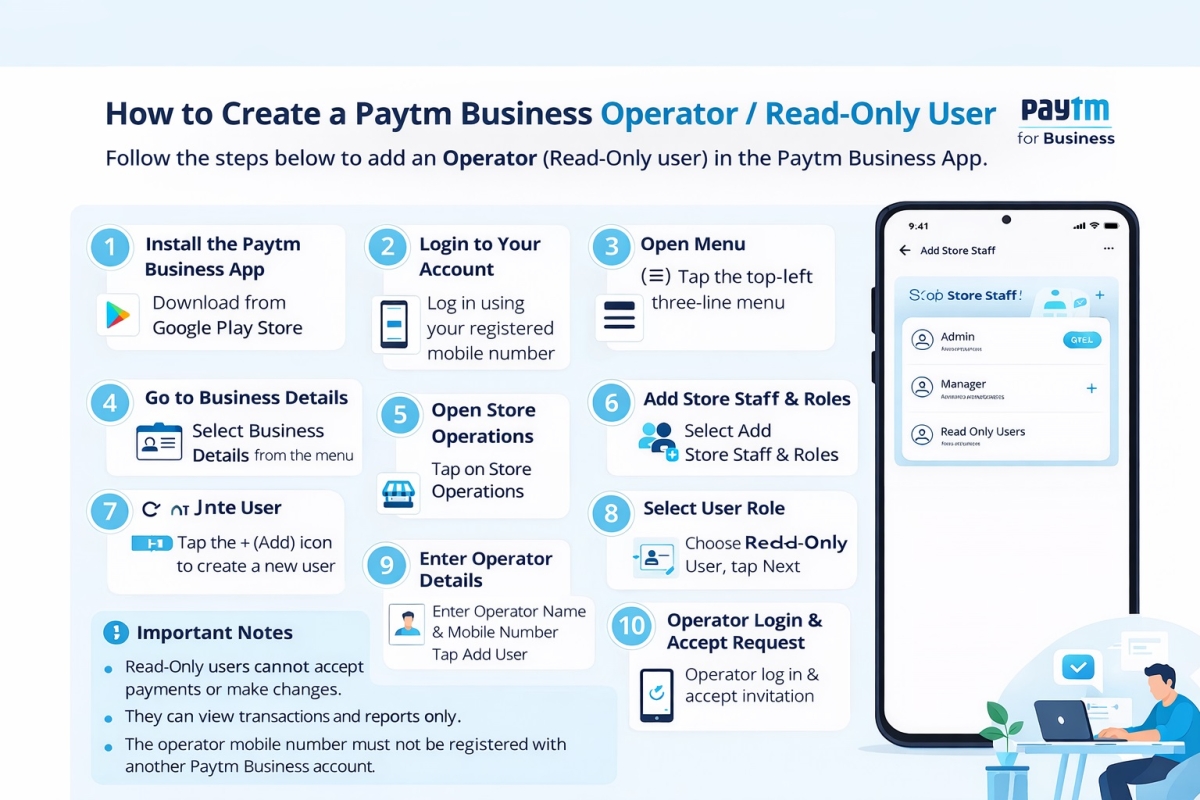
How to Create a Paytm Business Operator or Read Only User
29 Dec 2025 103