Phonepe Business 30 Dec 2025
PhonePe Business App and complete the eKYC process
1️⃣ Install PhonePe Business App
- Open Google Play Store (Android) or Apple App Store (iOS).
- Search “PhonePe Business” → tap Install / Get.
- Open the app after installation.
2️⃣ Sign Up as a Merchant
- Tap Sign Up → enter your mobile number → get OTP → verify.
- Fill in details: full name, business name, address, business category → submit.
3️⃣ Link Your Bank Account
- Tap Add Bank Account.
- Select your bank → verify via OTP sent by your bank.
- Must match your mobile number.
4️⃣ Complete eKYC
- Requirements: Aadhaar/VID, PAN, GST (if applicable).
Steps:
- Tap Profile → KYC / eKYC Verification.
- Select Aadhaar eKYC → enter Aadhaar/VID → give consent.
- Enter OTP sent to Aadhaar-linked mobile.
- Submit → status shows In Progress / Verified.
- KYC usually completes within 3 business days.
5️⃣ Optional Verification
- PhonePe may request document upload (GST, PAN) or agent visit for larger businesses.
6️⃣ Check KYC Status
- Go to Profile → KYC / Verification → see Completed / Pending / In Progress.
- If failed, follow instructions to re-upload or correct documents.
✅ After eKYC
- Display your PhonePe merchant QR code.
- Accept UPI, cards, wallets.
- Track sales, settlements, and analytics in-app.
-
Categories
- Paytm Business 2
- Phonepe Business 2
- BharatPe Business 2
- SmartupiQR 2
- FreeCharge Business 1
Popular Posts
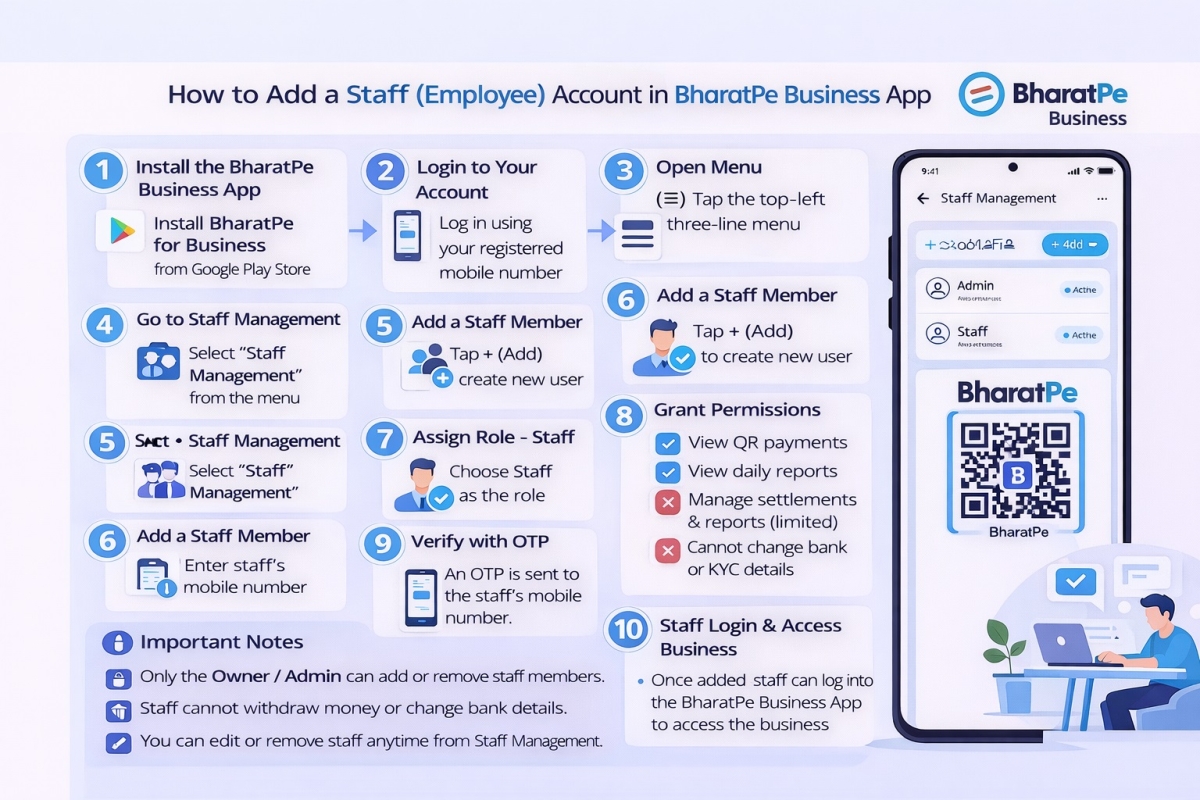
Step by step guide to create a Staff account in the BharatPe…
30 Dec 2025 126

Why SmartupiQR Is the Best Dynamic QR Code API for Instant Bank…
31 Dec 2025 112
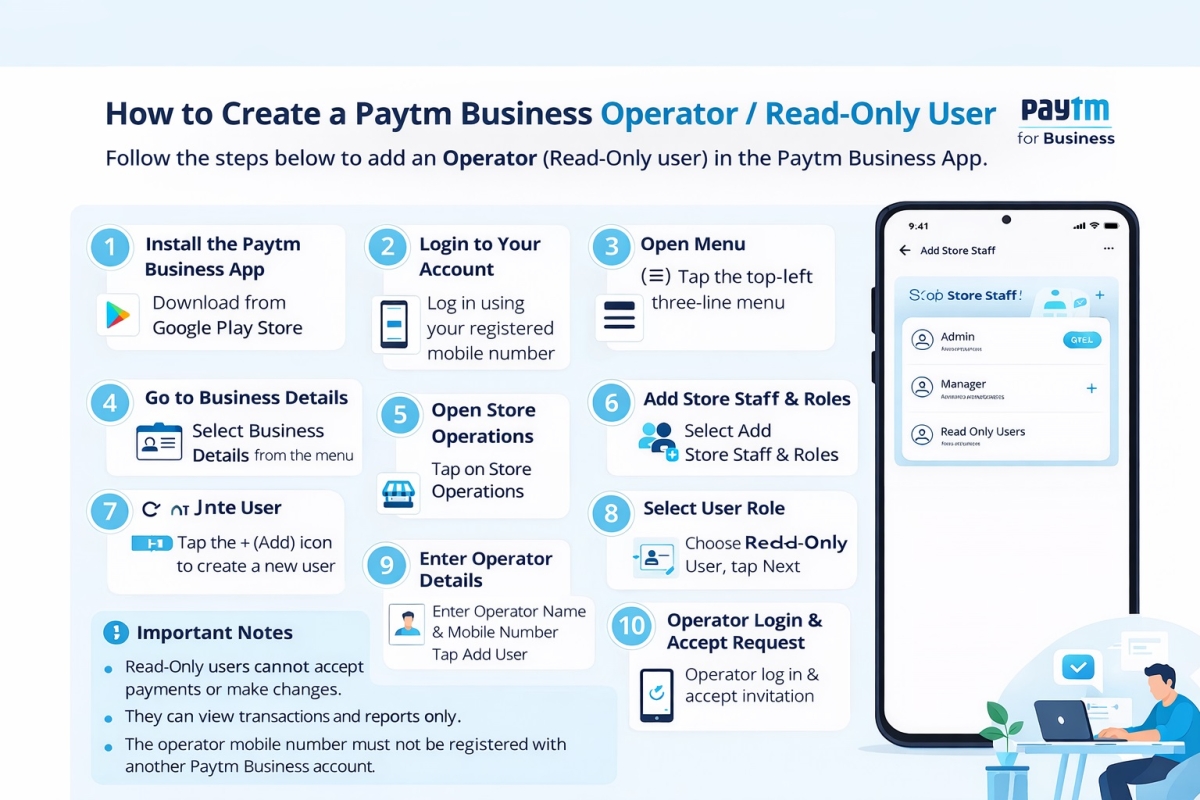
How to Create a Paytm Business Operator or Read Only User
29 Dec 2025 103